
Technology is advancing at an ever-increasing pace, and in its wake are left the traditional 16mm film formats cherished by many. Don’t let these precious memories fade away into obsolescence.
This blog will show you why transferring your 16mm to digital format should take priority and provide steps for safely preserving them. Join us as we unlock the secrets of converting analog tapes to modern storage solutions so that future generations can experience those special moments!
Read on for more information about how you can transfer your valuable 16mm films before time runs out.
Reasons You Should Convert 16mm Films to Digital
Have you considered converting your 16mm film to digital for preservation, accessibility and flexibility? With technological advances, what was once a complicated process has become more accessible and cost-effective. Conversion of your materials will guarantee long-term archival quality so that future generations can access them.
Additionally, with professional transfer services available today, high-end scanners ensure maximum picture clarity, while color correctors help refine any post-production work needed after conversion. This ensures that no matter how much time passes or equipment changes occur. You can be sure your material won’t just endure but also retain its original look over many years.
How To Transfer 16mm Film to Digital
Here are some tips on transferring your 16mm film to digital formats yourself.
- Clean the 16mm film projector: Before starting the transfer process, it’s essential to clean the projector and remove any dust or debris from the reels. This will ensure that the film runs smoothly and the final image is clean and clear.
- Inspect the film: Look for any broken or bad splices and replace or remove them. This will ensure that the film runs smoothly and the final image is not affected by any damage.
- Set up the projector: Position the projector near a projector screen and make sure the projector is level and the focus is adjusted correctly.
- Position the camcorder: Place the camcorder lens above the projector and adjust the frame size or camcorder placement as necessary until a reasonable film size is achieved.
- Record the film: Start recording the movie on the camcorder. Remember to record the entire film, including the leader and the trailer.
- Edit the footage: After the film is recorded, you can edit the footage, if necessary, to trim any unwanted sections.
- Convert the footage: After editing, convert the footage to a digital format such as MP4, AVI, or MOV.
- Backup and store: Back up the digital files and store them safely.
Benefits of Hiring a Professional Service
There are a few benefits of transferring your 16mm film to digital format, but the most significant is a small cost saving. As with any do-it-yourself undertaking, the main idea is to save the money paid to a professional to do the job.
While you may save a few dollars, you must weigh that with the time and effort needed. Plus, you will only get a high-quality end product if you have the proper equipment. And if you have to buy the equipment, you’ve already spent the money you could’ve used on a professional!
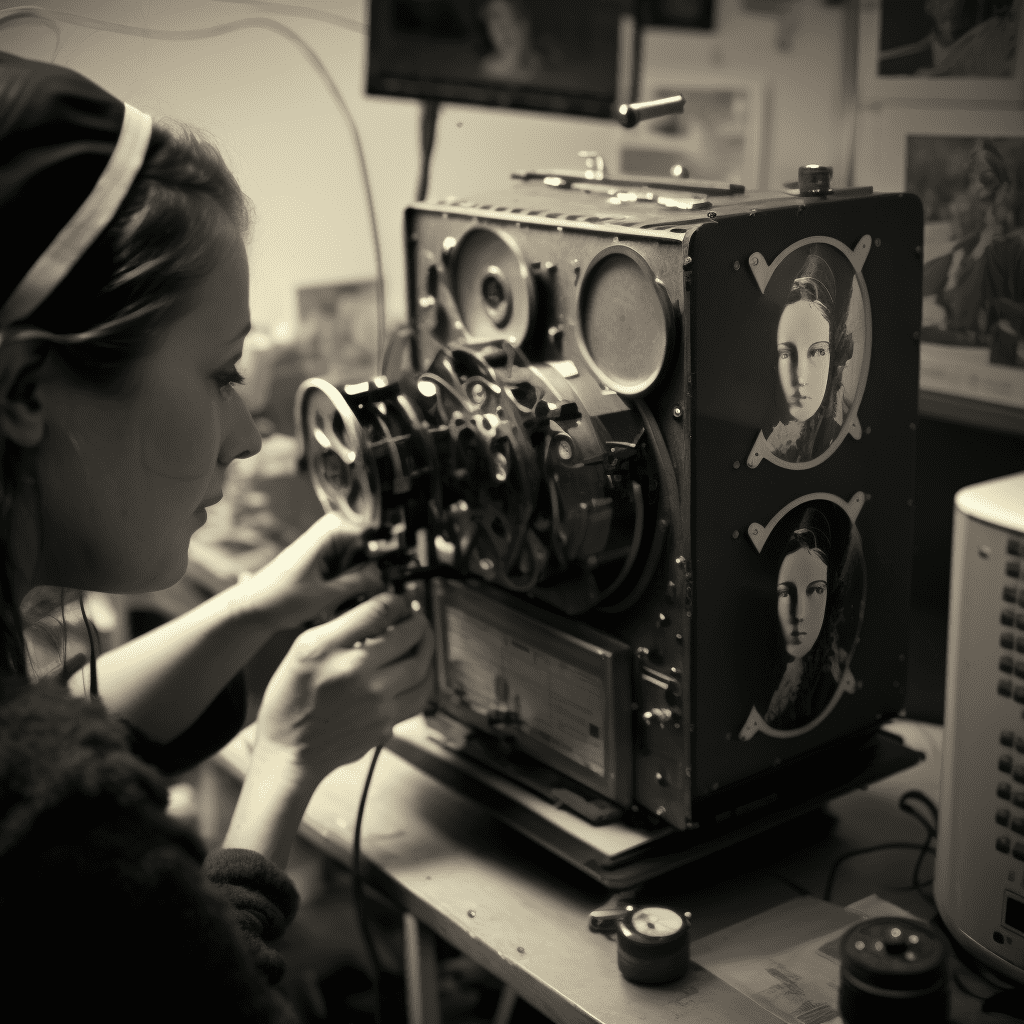
Capture’s media transfer services can digitize 16mm films into more secure, easily shareable, and longer-lasting formats. If you have one or multiple movies, a professional transfer service can get them onto digital quickly, efficiently, and at the best price possible. There’s no effort on your part. Drop the films off at a film transfer business and pick them up when they are done. Some professional stores may deliver them to you!
Conclusion
Transferring 16mm film to digital format is essential to preserve precious memories for future generations. The process can be done either by using a DIY approach with a 16mm film projector, camcorder, and editing software or by hiring a professional transfer service like Capture.
Professional services use high-end film scanners that capture each film frame at the highest resolution possible, ensuring that the final product is of the highest quality. They also provide additional services such as color correction, dust and scratch removal, and sound restoration. Be proactive in preserving your 16mm film memories, so transfer your film quickly. The sooner you do it, the better your chance of keeping your memories for future generations.


More Stories
Best Budget Mechanical Keyboards in 2026: What to Buy (and What to Avoid)
Vimeo to MP3 Converter: Best Tools That Actually Work (Free & Online)
How to Combine Videos on iPhone